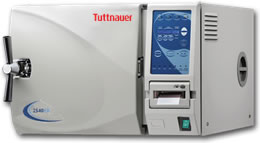
Automatic Autoclave Installation

For units with a Microprocessor version # ending in WP (the version # is displayed on the screen each time the unit is turned on).
- Place unit on a sturdy level counter.
- Fill the Reservoir with distilled water
- The unit is ready to operate
To Adjust the Filling Time:
- Press the STOP Key repeatedly until the message "Code:xxx" appears.
- Using the UP/DN arrow keys change the code to 105, then press the STOP Key.
- A message will be displayed saying "Water in = xx sec"
- Using the UP/DN arrow keys change the seconds according to the following:
* EZ9 = 30 sec
* EZ10 = 35 sec
* 3870EK = 65 sec
Now press the STOP Key - On some older units the message "Ea Type:" will appear,using the UP/DN arrow keys select either "0" for an E or EK type unit or "1" for an EA or EKA type unit.
- Press the STOP Key to finish
- The unit is ready to operate
For units with a Microprocessor version # NOT ending in WP
- Follow steps 1–5 for Manual Units above,then empty the water from the chamber and check the automatic water fill.
- Turn the unit on
- With the door open press and hold the door switch,then press the start button. When water starts flowing release the door switch.
- Water should come up to the same spot as the measured amount had.
- If need be adjust the automatic fill using the following procedure.
To Adjust the Automatic Filling:
- While leaving the door open turn power off.
- Press and hold the Manual Water Fill Button (this is the button with the two arrows).
- Turn the power back on
- When the normal display screen appears release the fill button –immediately press it in again and monitor the water flow
- Continue to hold the button until water reaches groove at front –then release button – wait ten seconds – the unit is reprogrammed.
